Blog Post

The Ability to Confirm Metrological Parameters of Ultrasonic Gas Meters under Operating Conditions after Calibration on Air at Atmospheric Pressure

  • By Ivan Medvedev
  • 05 Oct, 2018

 The present study aims to analyze trends and prospects for the development of measurement technologies of natural gas metering by the example of ultrasonic flow meters (USM). International regulatory documents in the context of the USM classification depending on their accuracy class have been analyzed. The actual issues of USM verification and calibration have been studied. Theultrasonic flow meterstechnology enabling to confirm metrological parameters under operating conditions after calibration on air at atmospheric pressure has been presented.

 With increasing requirements for measurement accuracy in custody transfer of natural gas, initial calibration and subsequent verification of measuring instruments in the environment as close as possible to the operating conditions is the most arguable issue among professionals.

 As of today, due to the functional advantages, accuracy and reliability in operation, these are ultrasonic gas meters (USMs) that have become an integral part of modern measuring units for custody transfer of natural gas.

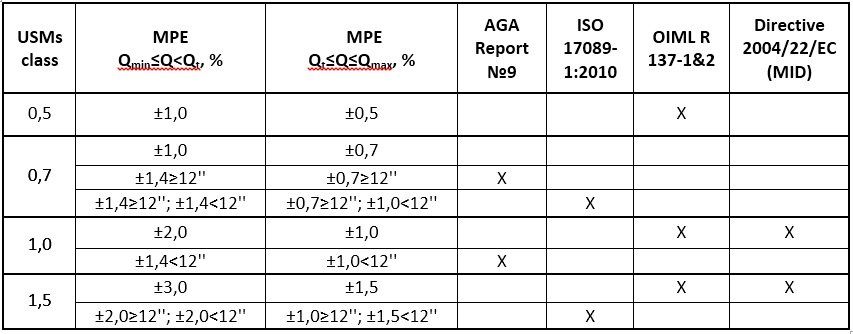
 Analysis of the main international regulations and industry standards demonstrates the lack of a unified requirement approach to the definition of working medium and pressure when implementing calibration and subsequent verification (recalibration) of USMs [1-4]. Depending on the accuracy class of meters and parameters of the working environment, recommendations for testing, calibration and verification of ultrasonic meters has been outlined. At the same time, classification of the meters depending on the maximum permissible error (MPE) has been defined (Table 1).

 Table 1 – Comparative analysis of USMs classification depending on MPE limits

 Requirements to MPE value can be changed according to design requirements for metering units of gas custody transfer, as well as depending on the peculiarities of national legislation. Therefore, when constructing new, replacing and maintaining existing metering units, the end user, the technical operator can specify the requirements for the accuracy class, initial calibration and subsequent verification of USMs.

 A comparative analysis of the most important international regulations shows that ultrasonic gas meters of class 0,7 and 1,0 with MPE ±0,7-1,0% in the range Qt≤Q≤Qmax prevail in international classifications.

 According to the regional regulatory requirements in the countries of Eastern Europe, Central Asia and the Middle East, this very class of meters is the basic one for custody transfer of natural gas, and the implementation of verification (calibration) of Ultrasonic flow Measuring on natural gas at working pressure is objectively related to a lack of technical capabilities. For example, formal verification scheme approved by the CIS, nowadays does not imply verification (calibration) of USMs on natural gas and at operating pressure [5,6]. It is noteworthy that the only precise official mention of USMs verification on natural gas described in the Corporate Guidelines "Organization and Procedure of Verification and Calibration of Ultrasonic Transducers of Gas Flow Rate in OAO" Gazprom ", where "natural gas is recommended as calibration medium for verification of high precision USMs whose maximum permissible relative error is not more than 0.35%"[7].

 The definition of the rules and criteria to justifyultrasonic flow meterscalibration under operating conditions has remained of current concern.

 The question arises as to meters of what accuracy classes need to be calibrated on natural gas, and for which it is not necessary? Is it possible to confirm the metrological parameters of USMs class 0.5; 0.7 and 1.0 in the range of the operating conditions Qt≤Q≤Qmax after calibration on air at atmospheric pressure?

 At the present time, for USMs being more precise than class 0.5, initial calibration followed by subsequent verification (recalibration) on natural gas at a pressure close to the working pressure, the most acceptable is considered to be the method to achieve the most accurate measurement results in real conditions during custody transfer. Therefore, application of this technique has a number of known limitations, primarily related to the high cost of services and underdeveloped network of accredited calibration laboratories.

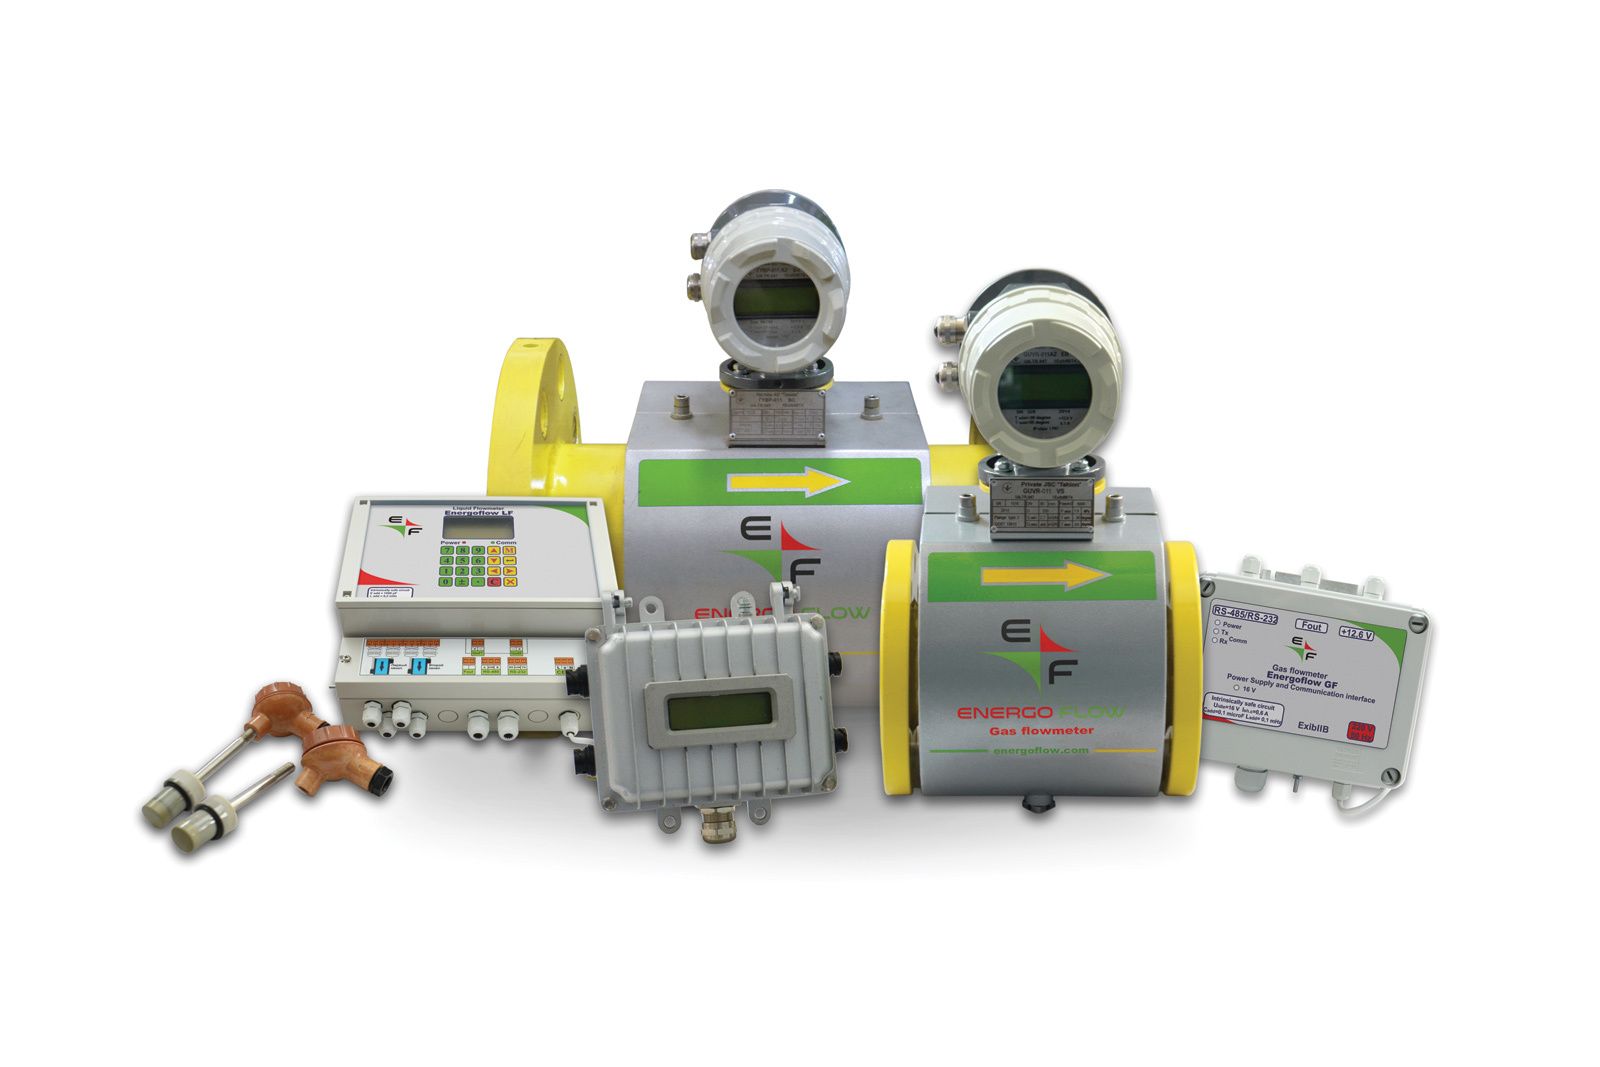
 To determine the feasibility of initial (subsequent) calibration of USMs class 0.5; 0.7 and 1.0 under operating conditions, the experimental study was carried out within the framework of testing two-pathultrasonic flow meter GFE 202 and gas flow meter four-path GFE 404 manufactured by Energoflow AG in accordance with the requirements and recommendations of the Directive 2004/22/WE (MID) and OIML R 137-1&2.

  During device designing, there was used an algorithm enabling to implement the simulation model of calculations taking into account the dynamic processes in the measuring flow. This solution allows for performance of meters calibration on air at atmospheric pressure whilst the configuration of the Electronics unit for parameters of operating environment corresponding to the actual conditions of meter operation (parameters of natural gas, range of working temperatures and pressure) makes it possible to save permissible values of errors in operating conditions in various mediums and different pressures.

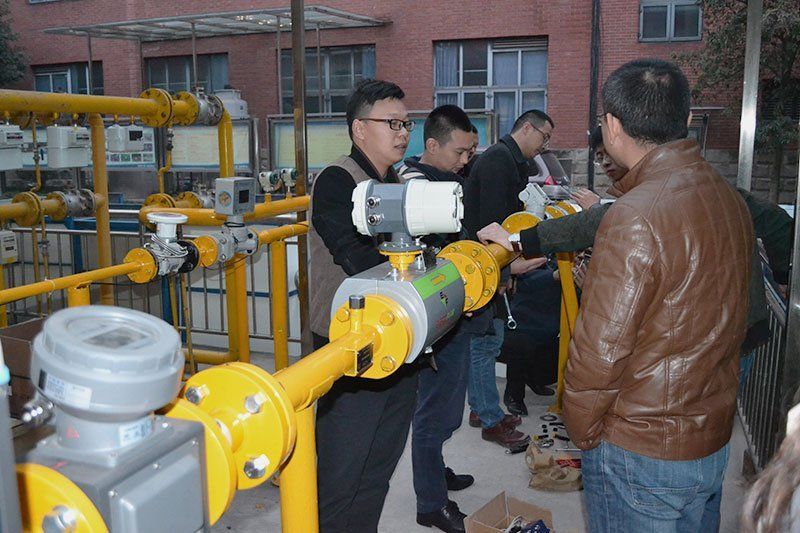
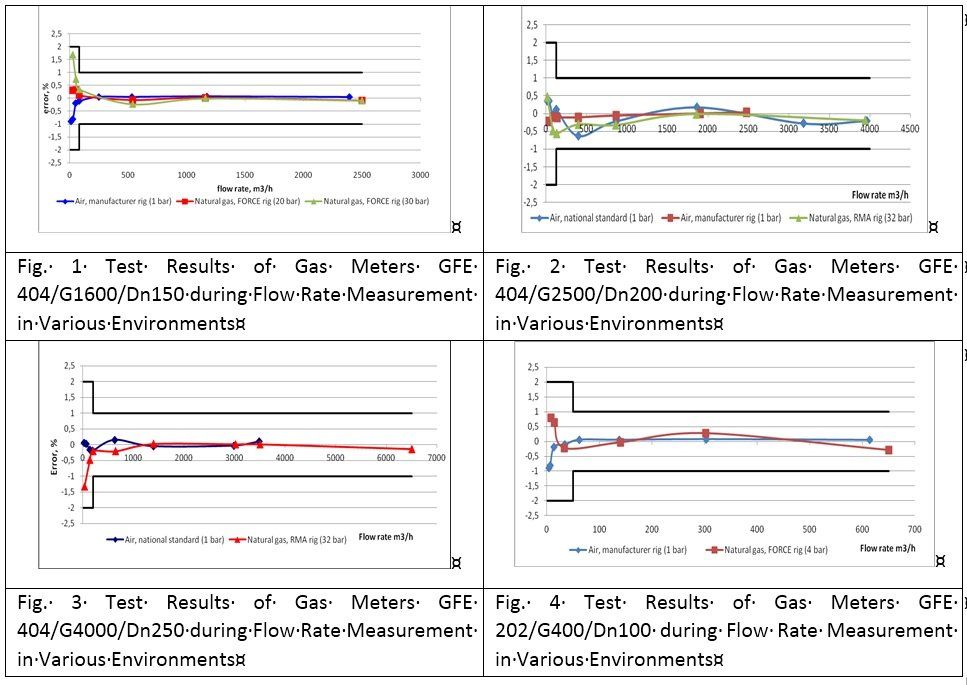
  The results of meters verification of DN100, 150, 200, 250 on natural gas at different pressure values up to 40.0 bar in FORCE Technology Laboratories, Denmark and RMA Mess- und Regeltechnik GmbH & Co. KG, Germany after their initial calibration on air at atmospheric pressure have demonstrated that such meters modifications confirmed the accuracy class 0.5; 0.7 and 1.0 in the range Qt≤Q≤Qmax according to OIML R 137-1 & 2, ISO 17089-1: 2010 and AGA Report No. 9 respectively [8,9]. The point is that the meters of nominal size G2500 and G4000 were calibrated on air within flow range Qmin-Qmax/2 at manufacturer’s facilities. (Fig. 1-4).

 Despite the general trend towards calibration (verification) of ultrasonic gas meters under operating conditions, this requirement is not always an efficient one. Due to a significant reduction in the cost of calibration and related transport costs for subsequent maintenance, this technique allows to expand the opportunities for USMs class 0.5; 0.7; 1.0 after calibration on air without additional calibration at  working pressure on natural gas.

 The results obtained unfold the prospects for further research and improvement of Ultrasonic flow measuring technology with the view of accumulating statistics of the test results and possible approval of the described technique at the normative level.

Make to order Ultrasonic gas flow meters at sales@energoflow.com
By manager November 22, 2018

Origin of pigging

When crude oil was first found on the american continent, the first pipelines were built. And very soon the prospectors found that the pipelines were getting clogged with paraffin and debris. They used a simple solution - one used centuries ago by Romans to clean their aqueducts.

An object roughly with the diameter of the linesize was introduced into the flow. The flow pushed it along the pipeline and it would remove dirt and paraffin from the pipe wall.

Why “pig”?

The cleaning device is generally called a “ PIG ”. Maybe it was so called because earlier, these inserts were covered in leather and made a high pitched squealing sound when the leather rubbed against the pipe inner surface - a sound every farmer who had pigs could identify very well!

(Of course, some say that “ PIG ” is an abbreviation for “ Pipeline Inserted Gadget ” - but they obviously have never heard pigs squealing.)

Why pig detectors are needed?

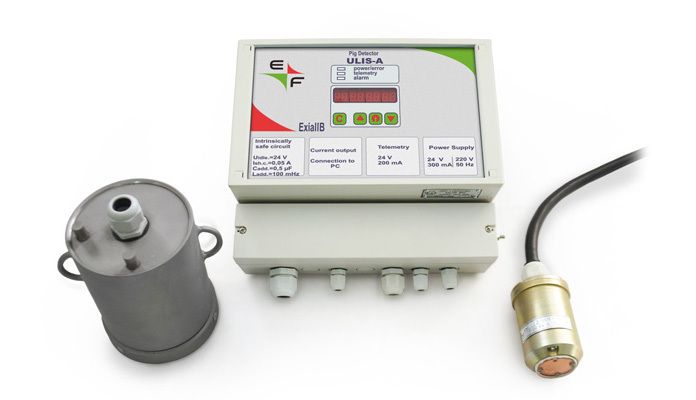
Over time, the pipe geometry changes. Besides, sometimes the pipes are so clogged that the flow is not strong enough to force the pig through the debris. This might result in the pig getting stuck - then the flow is blocked and the pipeline may even get damaged due to pressure build-up. Since the pipeline section being pigged is hundreds of kilometers long, locating the place where the pig is stuck is difficult, time consuming and, in general, involves lots of digging . Therefore pig detectors are installed along the line to monitor the progress of the pig. Besides, pig detectors are installed at the sites where the pig is inserted in the pipeline (pig launcher) and where the pig is removed from the pipeline (pig receiver)

Why non-intrusive active ultrasonic pig detectors are more reliable:

  • They do not cause disturbance to flow , do not need modification of pipeline , can be automatically reset (as compared to mechanical intrusive type pig detectors);
  • They are not dependent on the pig type , can be used with pigs made of any material without the need of attaching a magnet to the gadget and do not cause magnetization of the pipe (as compared to magnetic type pig detectors);
  • They generate their own ultrasonic signal and therefore provide 100% reliable pig detection and are not affected by noises in the ultrasonic diapazone which are generated by other factors (as compared with passive non-intrusive ultrasonic pig detectors).


If you'd like to consult with one of our flow specialists to help you choose the ultrasonic flow measurement solution that best suits your application, please feel free to contact us .

By Ivan Medvedev October 5, 2018
Ultrasonic flow meters use sound waves to determine the velocity of a fluid flowing in a pipe. At no flow conditions, the frequencies of an ultrasonic wave transmitted into a pipe and its reflections from the fluid are the same
By Ivan Medvedev February 12, 2018
Upcoming exhibitions of Energoflow AG gas flow meter manufacturer at 2018
By Ivan Medvedev January 22, 2018
We are growing in new gas flow meter China markets: GFE-202, GFE-404, HORN
By Ivan Medvedev October 9, 2017
Energoflow AG can also design Integrated Metering and Monitoring Systems (IMMS) tailor made for your requirements
Share by: